
How to Move WSUS Content and Database Files to a Different Volume
Note: I recommend you perform these steps after hours due to significant resource requirements.
Moving the WSUS Content Folder to another volume
1) You look, where the WSUS Content Folder is located.
2) Then you open a command shell window, in this window browse to the WSUS Program Folder (like: C:\Program Files\Update Services)
3) In the WSUS Program Folder there is a sub-folder, called “Tools”, open it.
4) There you found a tool, called “wsusutil.exe”
5) Simply start it, with the following syntax: wsusutil.exe movecontent “Path of the new content” “Path of the logfile” The Path also can be a simply share on another server (like \\SERVER\SHARE
6) All you have now to do is simply wait till the tool moved the content to the new location. When it is finished, a message is seen in the command window.
How to move the WSUS Database files
Prior to moving the database, please stop the following services:
- IIS Admin Service
- Update Services (Not Windows Update Service!).
You can do this via the commandline or by using the Services MMC snap-in (start run, services.msc).
Command line:
|
1
2
|
net stop "update services"net stop w3svc |
(Once the database has been moved you will need to restart these services. Also note that if you have any other services which are dependant on the above services – such as Terminal Services Gateway – they will also be stopped and will need to be restarted.)
Note: It is recommended to be done out of hours as stop the IIS service can impact Outlook clients access to Exchange server.
Once the services have been stopped, you can proceed to detach the database.
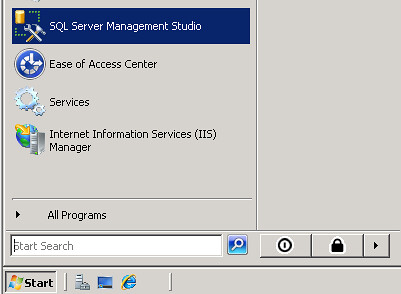
1. Open SQL Server Management Studio.
2. Using the connection window, fill in the following information and then click Connect
- Server type: Database Engine
- Servername: \\.\pipe\MSSQL$MICROSOFT##SSEE\sql\query
- Authentication: Windows Authentication

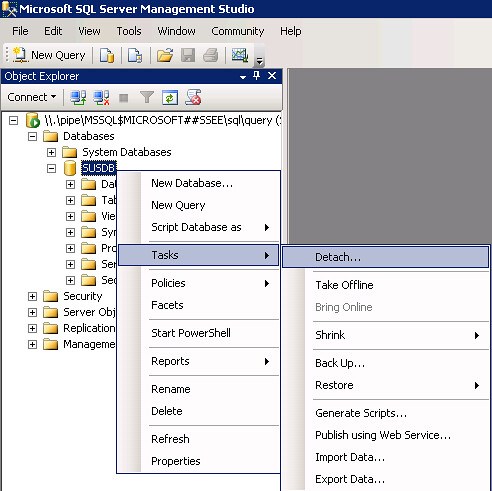
3. Expand Databases and right-click on SUSDB and select Tasks > Detach… from the context menu.
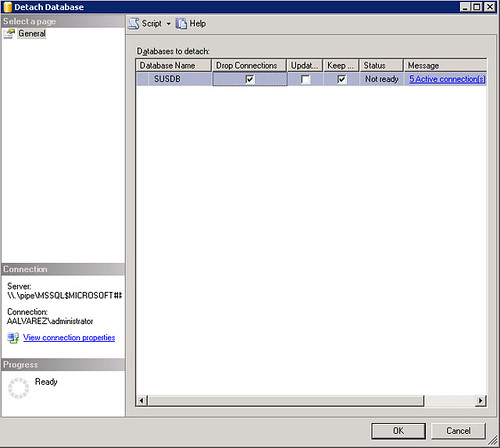
4. Select the “Drop Connection” checkbox and click OK.
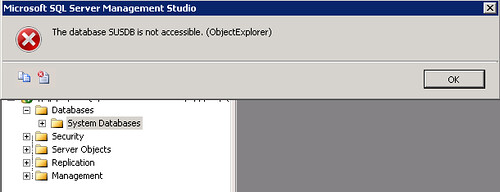
5. A message saying that the DB is not accessible should appear. Click OK.
6. Move the database files to the new drive or location where you are planning to keep it.

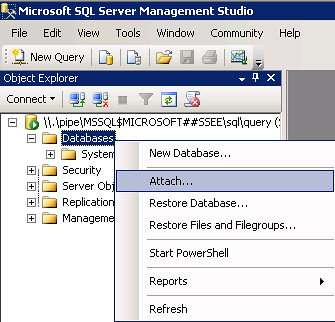
7. Back to the instance connection. Right-click Databases –> Attach.
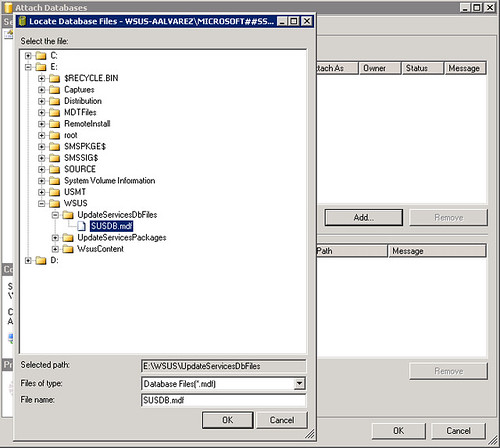
8. Click on “Add” and select the .mdf folder where you relocated the database.
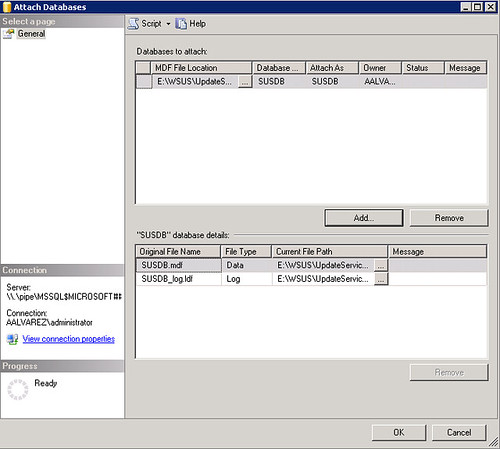
9. Click OK to attach it again.
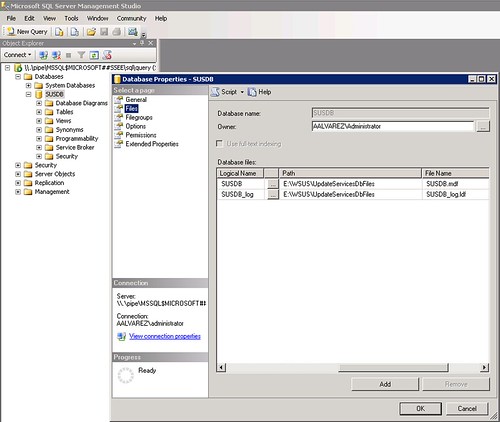
10. Your database should be working now on the new location.
How to cleanup the WSUS Database
Note: We recommend you perform these steps after hours due to significant resource requirements.
- Open the native WSUS console. Start > Programs > Administrative Tools > Microsoft Windows server Update Services 3.0 SP1.
- Expand your server and select Options > Server Cleanup Wizard.

Leave all boxes checked and click Next to start the cleaning process.

Note: This process may take many hours to complete (24+ in some cases).
Comments ()